本文开发一用户注册与登录的后端java平台。开发完后的网页效果:http://user-front.66bond.com/
后端主要提供用户的注册、查询、删除等操作。使用到的开发工具:
- IDEA2021; 关注公众号”青椒工具”,发送”IDEA”,获取windows下的IDEA安装包
- mysql 5.7;关注公众号”青椒工具”,发送”mysql”,获取windows下的mysql5.7安装包;
要对后端做的优化有:
- 通用对象返回;
- 封装全局异常处理;
- 全局请求日志和登录校验;
1、通用对象返回:
要将之前返回给前端的信息,作必要的封装后,再返回给前端。
比如之前返回给前端:
那么现在要返回给后端的数据:
1
2
3
4
5
6
7
| {
"code":***,
"data":{
"name":"yupi"
},
"message": "数据库访问失败"
}
|
我们在后端增加新的目录common,然后在其中增加BaseResponse类,并参照上述的数据格式来设计该类,由于data要承接各种数据类型,所以我们要使用泛型;
1
2
3
4
5
6
7
8
9
10
11
12
13
14
15
16
17
18
19
20
21
22
23
24
25
| package com.yupi.usercenter.common;
import lombok.Data;
import java.io.Serializable;
@Data
public class BaseResponse<T> implements Serializable {
private int code;
private T data;
private String message;
public BaseResponse(int code, T data, String message) {
this.code = code;
this.data = data;
this.message = message;
}
public BaseResponse(int code, T data) {
this.code = code;
this.data = data;
this.message = "";
}
}
|
使用通用返回对象:
然后我们进入controller package,其中的return语句都要用到BaseResponse进行封装;以其中的register为例:
1
2
3
4
5
6
7
8
9
10
11
12
13
14
15
16
17
| @PostMapping("/register")
public Long userRegister(@RequestBody UserRegisterRequest userRegisterRequest)
{
if(userRegisterRequest == null){
return null;
}
String userAccount = userRegisterRequest.getUserAccount();
String userPassword = userRegisterRequest.getUserPassword();
String checkPassword = userRegisterRequest.getCheckPassword();
if(StringUtils.isAnyBlank(userAccount,userPassword,checkPassword)){
return null;
}
return userService.userRegister(userAccount, userPassword, checkPassword);
}
|
需要将其修改为:
1
2
3
4
5
6
7
8
9
10
11
12
13
14
15
16
17
18
| @PostMapping("/register")
public BaseResponse<Long> userRegister(@RequestBody UserRegisterRequest userRegisterRequest)
{
if(userRegisterRequest == null){
return null;
}
String userAccount = userRegisterRequest.getUserAccount();
String userPassword = userRegisterRequest.getUserPassword();
String checkPassword = userRegisterRequest.getCheckPassword();
if(StringUtils.isAnyBlank(userAccount,userPassword,checkPassword)){
return null;
}
long result = userService.userRegister(userAccount, userPassword, checkPassword);
return new BaseResponse<>(0, result, "ok");
}
|
如果按照这种写法,UserController.java每个方法都要采用上述的写法,每次在new BaseResponse<>(0, result, “ok”)语句中都要书写”ok”,如何避免每次输入ok?这里做一个简单的封装:
在common目录中,增加ResultUtils.java文件:
1
2
3
4
5
6
7
8
9
| package com.yupi.usercenter.common;
public class ResultUtils {
public static <T> BaseResponse<T> success(data){
return new BaseResponse<>(0, data, "ok");
}
}
|
经过这个简单的封装,那我们的Register最后一行就可以修改为如下:
1
| return ResultUtils.success(result);
|
相比于原来就可以少输入很多重复的参数。如果你觉得每次输入ResultUtils.success()嫌麻烦,还可以设置live template,只需要敲击缩写字符串,IDEA可以帮你自动补齐。
live template: 可以用快捷缩写,让IDEA自动补齐”ResultUtils.success()”字符串,如图1所示。
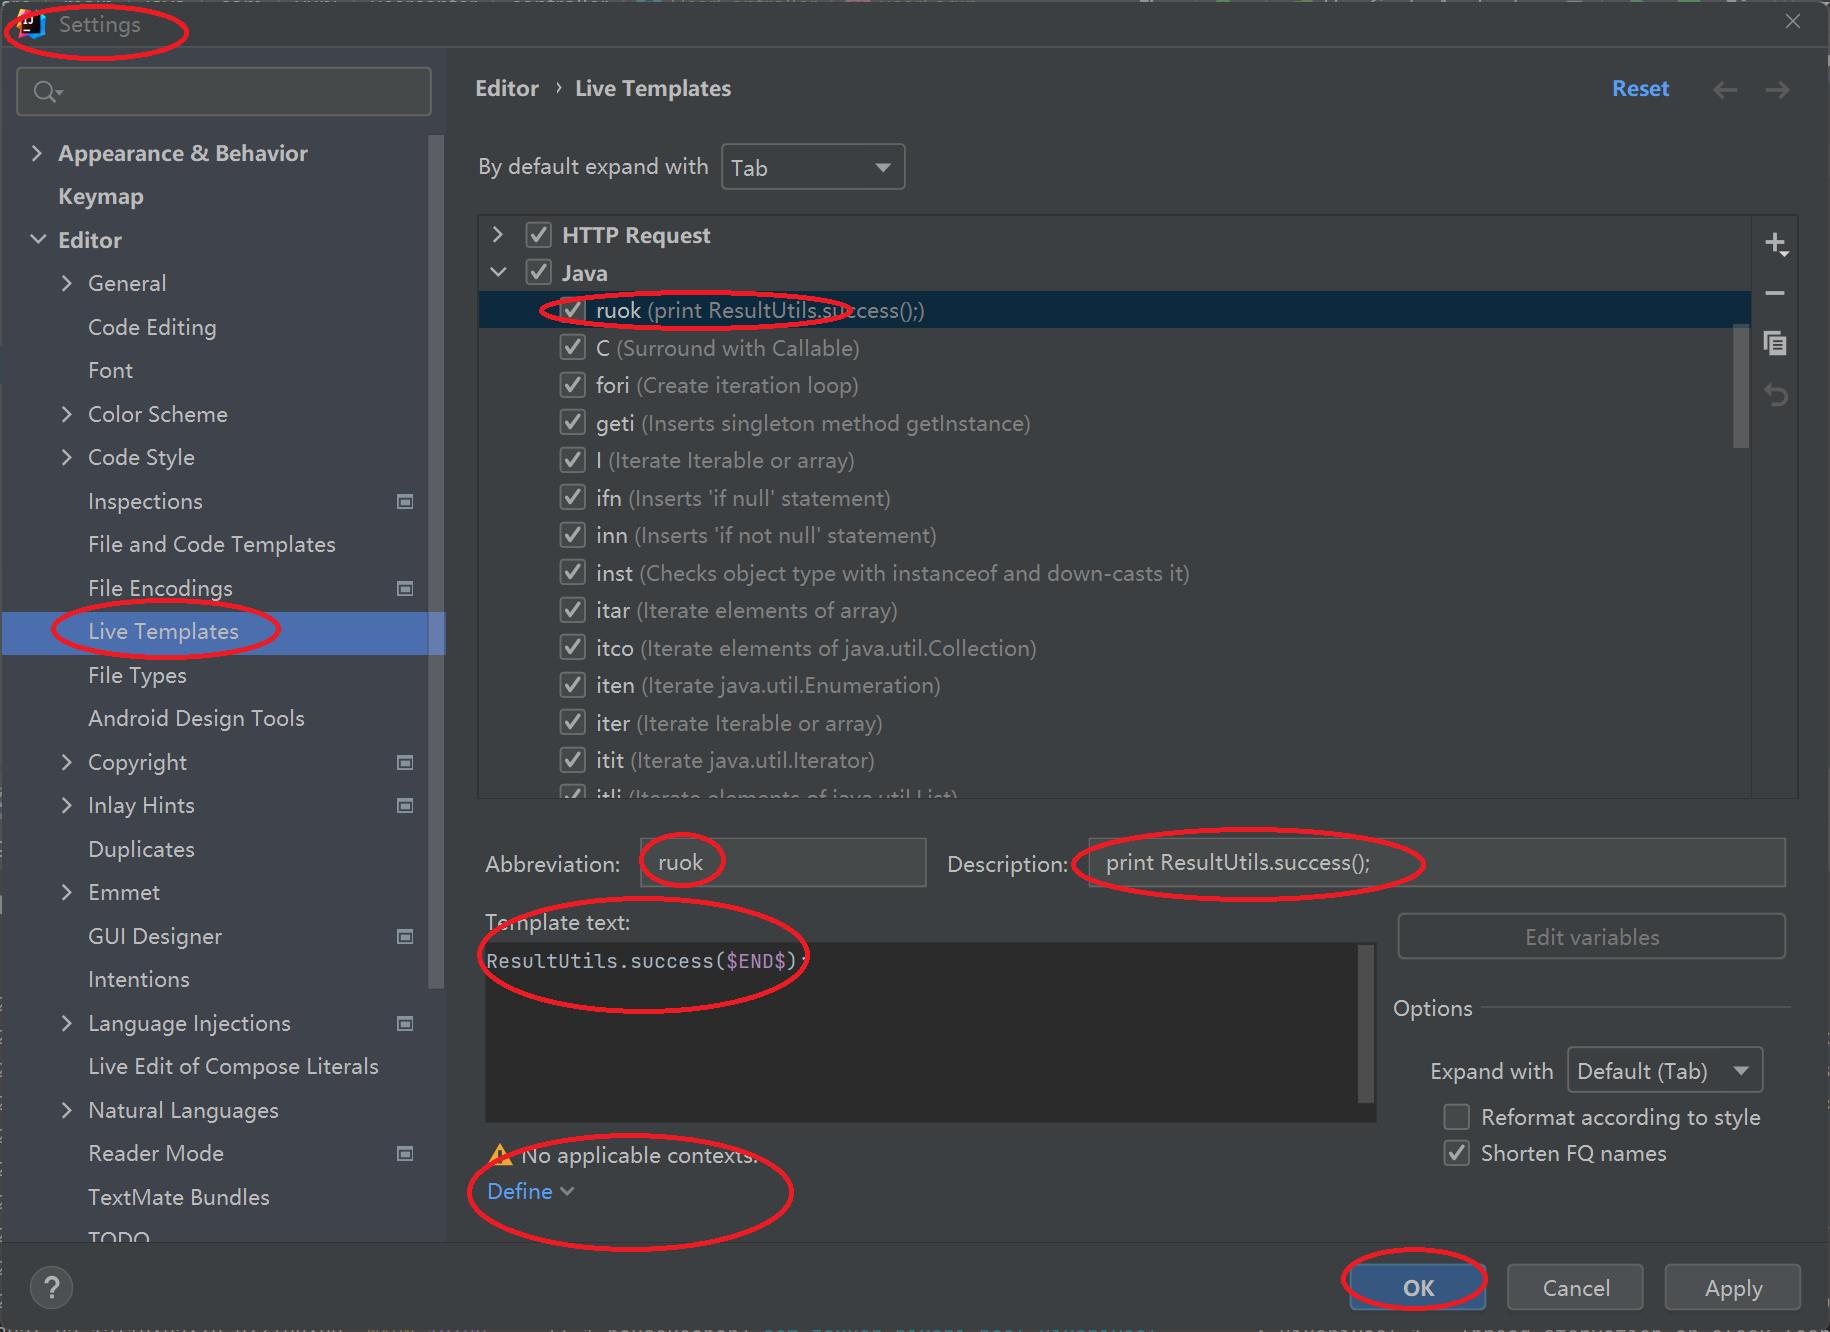
图1 设置live template
另外要注意的点:
boolean不能直接应用泛型,必须用包装类Boolean替代boolean。
2、封装全局异常处理
我们在common目录下定义一个错误类ErrorCode.java,其内容如下:
知识点:自动创建构造函数的快捷键:alt+insert
1
2
3
4
5
6
7
8
9
10
11
12
13
14
15
16
17
18
19
20
21
22
| package com.yupi.usercenter.common;
public enum ErrorCode {
SUCCESS(0, "ok", ""),
PARAMS_ERROR(40000, "请求参数出错", ""),
NULL_ERROR(40001, "请求数据为空", ""),
NOT_LOGIN(40100, "没有登录", ""),
NO_AUTH(40101, "没有权限", "");
private final int code;
private final String message;
private final String description;
ErrorCode(int code, String message, String description) {
this.code = code;
this.message = message;
this.description = description;
}
}
|
注意枚举数据类型需要使用逗号间隔;另外枚举数据不支持set方法,但支持get方法;
为了适配下方从ErrorCode生成BaseResponse对象,我们需要增加get方法。
1
2
3
4
5
6
7
8
9
10
11
| public int getCode() {
return code;
}
public String getMessage() {
return message;
}
public String getDescription() {
return description;
}
|
3、ErrorCode关联BaseResponse:
基于ErrorCode来生成BaseResponse,在ErrorCode.java中增加如下的代码:
1
2
3
| public BaseResponse(ErrorCode code){
this(code.getCode(), null, code.getMessage())
}
|
在ResultUtils.java中再定义一个与success相对应的error方法:
1
2
3
| public static BaseResponse error(ErrorCode code){
return new BaseResponse(code.getCode(), null, code.getMessage());
}
|
将上述应用到Controller中,比如对于register接口的代码:
1
2
3
4
5
| public BaseResponse<Long> userRegister(@RequestBody UserRegisterRequest userRegisterRequest)
{
if(userRegisterRequest == null){
return null;
}
|
此处对应的错误就是参数错误,所以我们可以修改为:
1
2
3
4
5
| public BaseResponse<Long> userRegister(@RequestBody UserRegisterRequest userRegisterRequest)
{
if(userRegisterRequest == null){
return ResultUtils.error(ErrorCode.PARAMS_ERROR);
}
|
上述写法的问题:错误的处理是分散的,我们能不能统一在一个地方处理?
答案是可以的,我们需要定义一个全局的异常处理类,以及全局异常类。我们首先创建exception异常package,然后其中创建BusinessException异常类。
1
2
3
4
5
| package com.yupi.usercenter.exception;
public class BusinessException extends RuntimeException{
}
|
查看RuntimeException类,发现其中并没有code属性,所以我们需要根据自身的场景封装;
1
2
3
4
5
6
7
8
9
10
11
12
13
14
15
16
17
18
19
20
21
22
23
24
25
26
27
28
29
30
31
32
33
34
35
36
| package com.yupi.usercenter.exception;
import com.yupi.usercenter.common.ErrorCode;
public class BusinessException extends RuntimeException{
private final int code;
private final String description;
public BusinessException(String message, int code, String description) {
super(message);
this.code = code;
this.description = description;
}
public BusinessException(ErrorCode code) {
super(code.getMessage());
this.code = code.getCode();
this.description = code.getDescription();
}
public BusinessException(ErrorCode code, String description) {
super(code.getMessage());
this.code = code.getCode();
this.description = description;
}
public int getCode() {
return code;
}
public String getDescription() {
return description;
}
}
|
采用全局异常类,我们再次应用到Controller中,比如对于register接口的代码:
1
2
3
4
5
| public BaseResponse<Long> userRegister(@RequestBody UserRegisterRequest userRegisterRequest)
{
if(userRegisterRequest == null){
throw new BusinessException(ErrorCode.PARAMS_ERROR);
}
|
对于其他的错误,也同样的处理;
我们启动前端,故意在注册时引入注册名重复的错误,可以发现后端会抛出异常,而前端出现500错误,如下图所示。
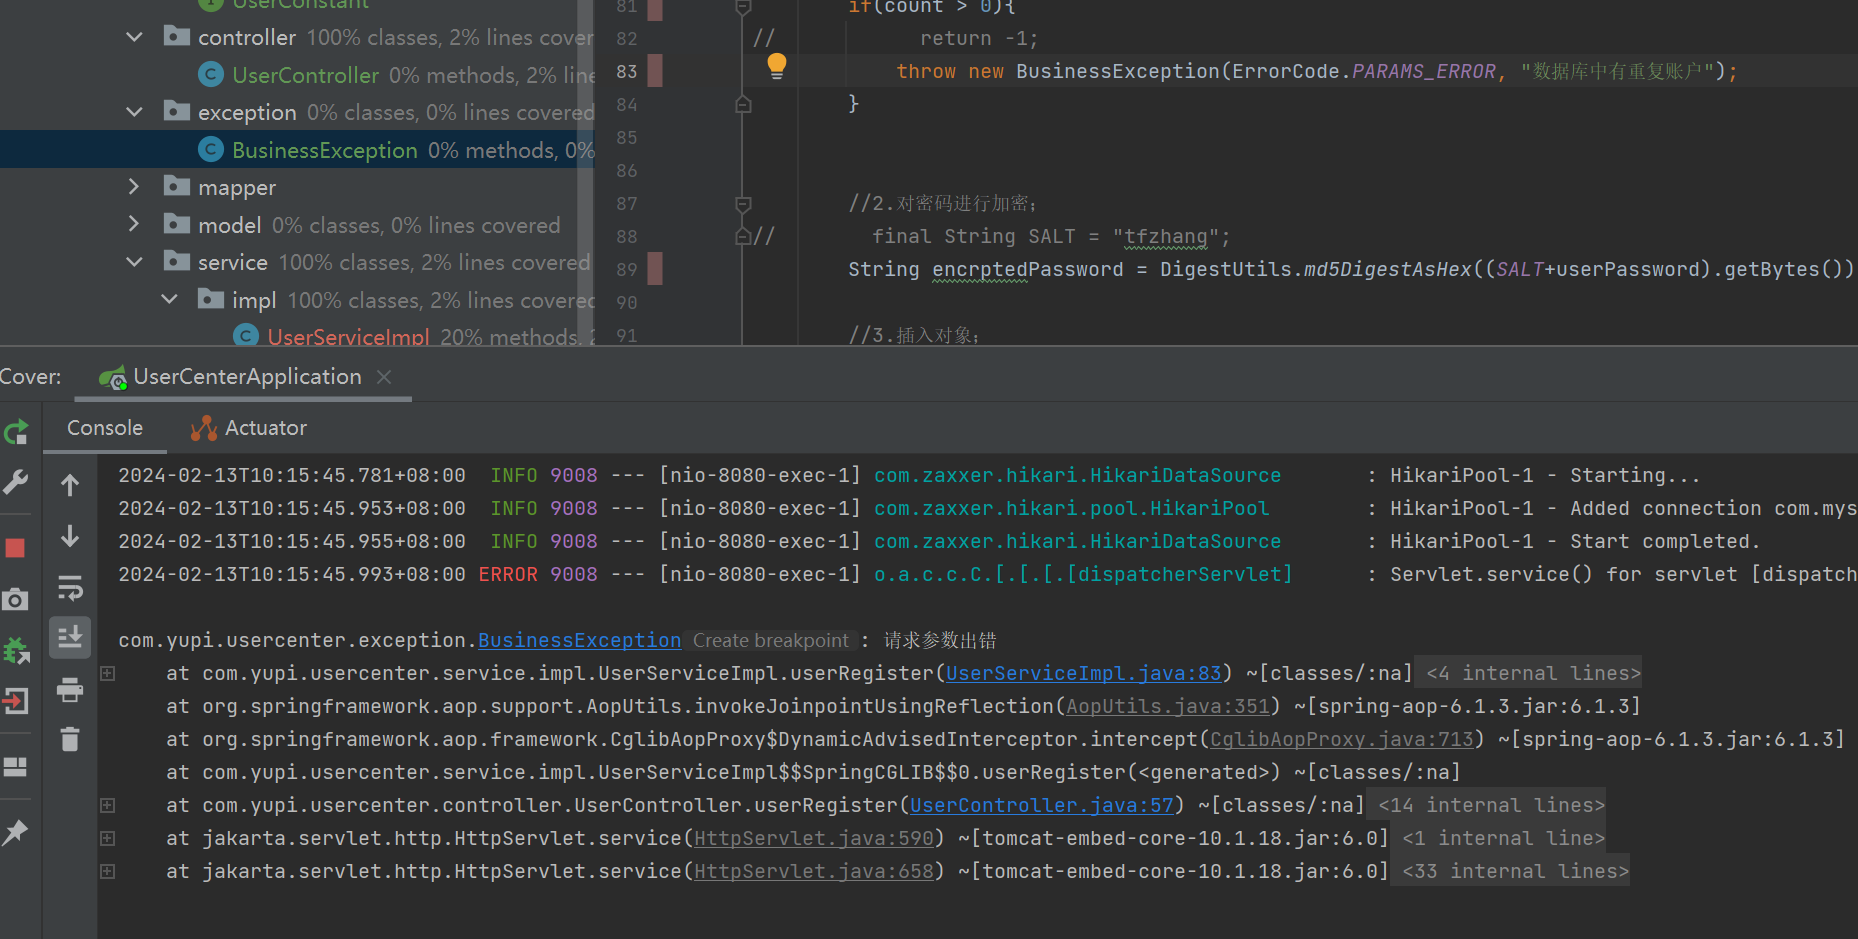
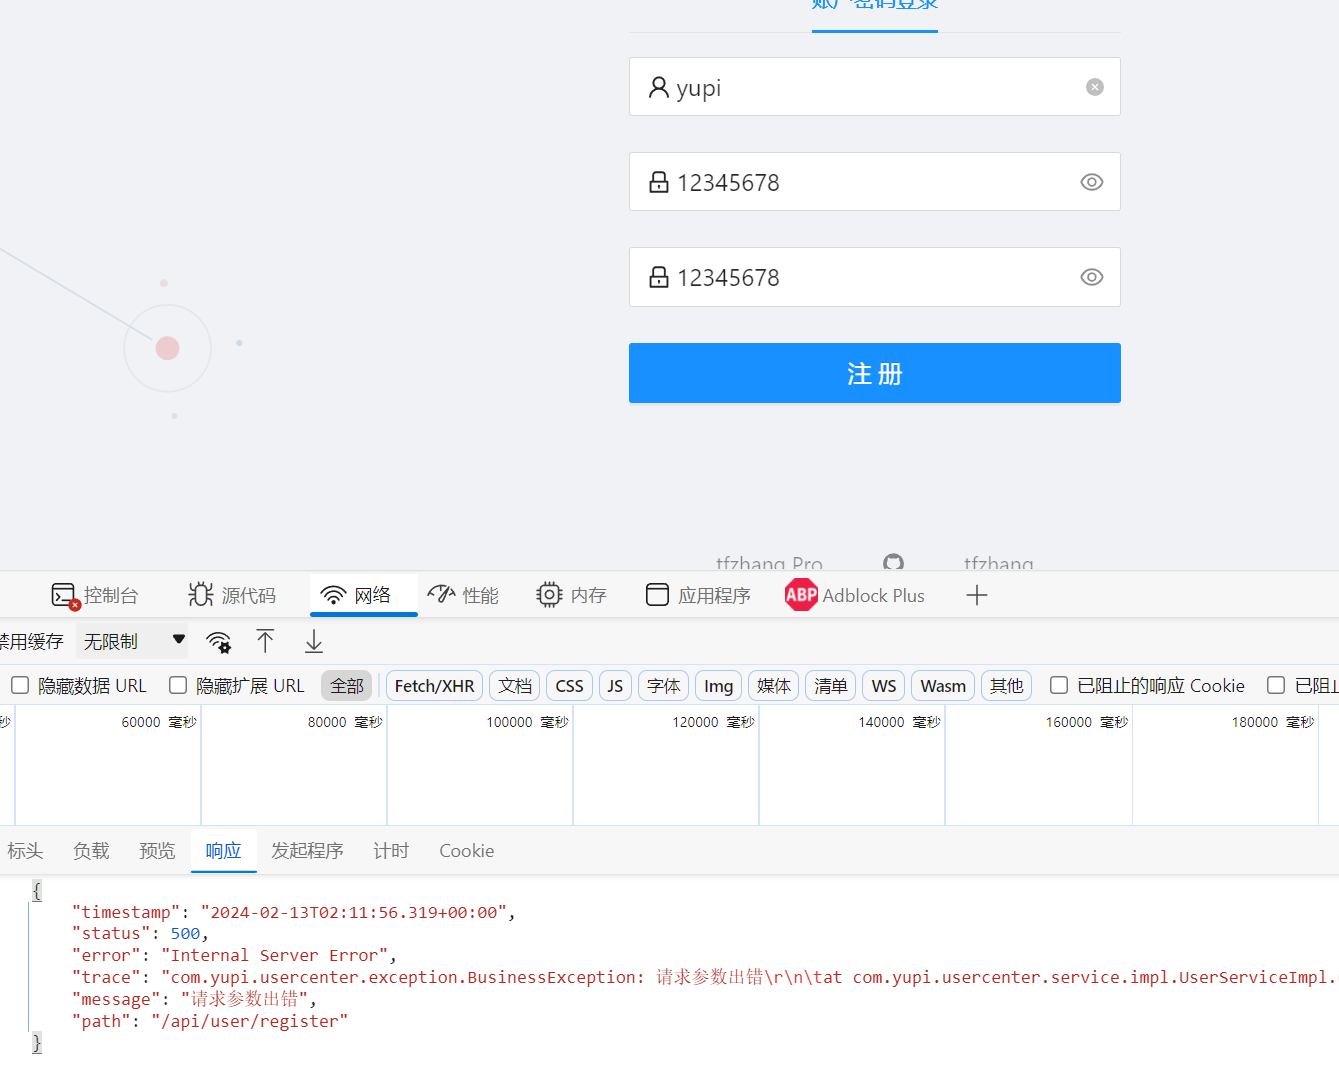
图2 前端和后端异常
当前因为没有异常处理方法,所以出现上述的问题,在exception目录中增加GlobalExceptionHandler.java这个文件:
1
2
3
4
5
6
7
8
9
10
11
12
13
14
15
16
17
18
19
20
21
22
23
24
25
26
27
28
29
30
| package com.yupi.usercenter.exception;
import com.yupi.usercenter.common.BaseResponse;
import com.yupi.usercenter.common.ErrorCode;
import com.yupi.usercenter.common.ResultUtils;
import lombok.extern.slf4j.Slf4j;
import org.springframework.web.bind.annotation.ExceptionHandler;
import org.springframework.web.bind.annotation.RestControllerAdvice;
@RestControllerAdvice
@Slf4j
public class GlobalExceptionHandler {
@ExceptionHandler(BusinessException.class)
public BaseResponse businessExceptionHandler(BusinessException e){
log.error("business exception: "+e.getMessage(), e);
return ResultUtils.error(e.getCode(), e.getMessage(),e.getDescription());
}
@ExceptionHandler(RuntimeException.class)
public BaseResponse runtimeExceptionHandler(RuntimeException e){
log.error("runtime exception:", e);
return ResultUtils.error(ErrorCode.SYSTEM_ERROR, e.getMessage(), "");
}
}
|
这个GlobalExceptionHandler可以统一处理所有的异常情况。
我们再以注册时,用户同名为例,此时前端的报错信息就变成如下:
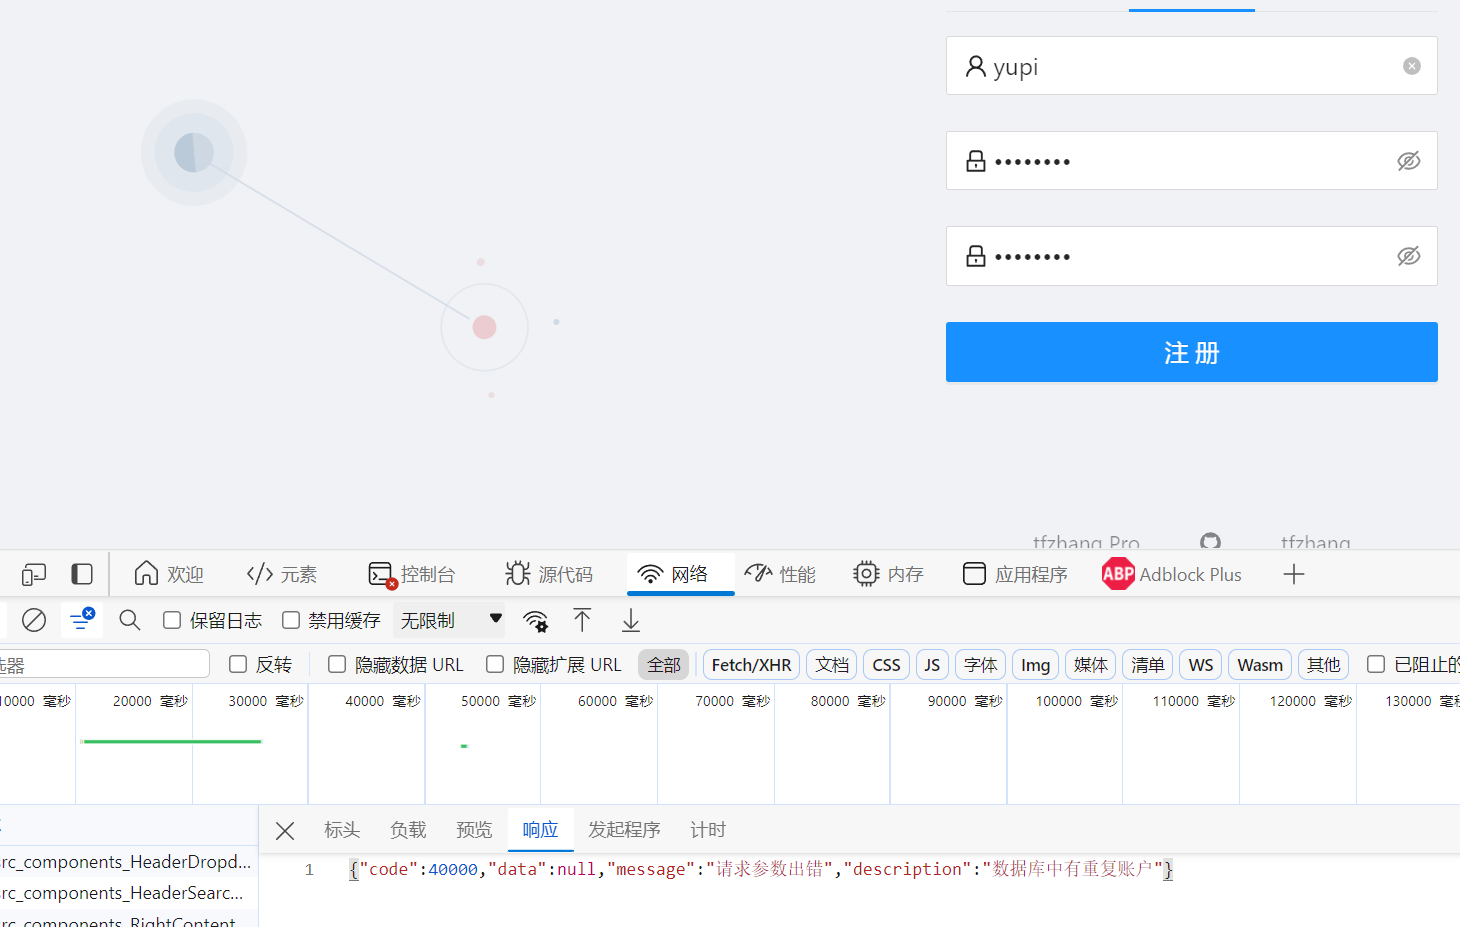
图3 前端收到后端的报错信息
4、参考资料:
本文参考自如下知识星球中的视频教程,更多的完整的相关视频教程,见如下的收费知识星球,近3万人的学习社区,
编程有人同行,学习不再迷茫: